How to Activate Notification Channels and Remove Your Tax Representative on Portal das Finanças
In 2022, Portugal changed its fiscal representation rules. These updates offer significant benefits to non-residents, particularly those outside the EU/EEA.
Specifically, the Circular Letter no. 90057 from 20 July 2022 indicates that non-EU/EEA residents no longer need a tax representative if they sign up for digital notifications via the Finanças portal.
You can read more details about this tax law changes by following this link:
https://novomove.com/docs/nif-basics/fiscal-rep-for-non-eu-eea-resident/
Activating notification channels on the Finanças portal is pretty easy, and we’ve got all the resources to help you out if you follow this guide.
Timing for Activation:
It’s important to note that the activation of your notification channel depends on when you make the request. Here’s how it works:
- If you submit your request on or before the 10th of the month, your notification channel will be activated on the 1st of the following month. (For example, a request made on January 7th will see activation on February 1st.)
- If you submit your request after the 10th of the month, your notification channel will be activated on the 1st of the month after next. (For example, a request made on January 11th will see activation on March 1st.)
In this guide, we’ll walk you through the steps to activate notification channels and remove your tax representative on Portal das Finanças effortlessly.
Before Getting Started
Before diving into the guide, ensure you have confirmed your email address on the Portal das Finanças. Once you’re prepared, let’s proceed with the steps outlined below.
How to Activate Your Notification Channels
Step 1: Log in to Portal das Finanças
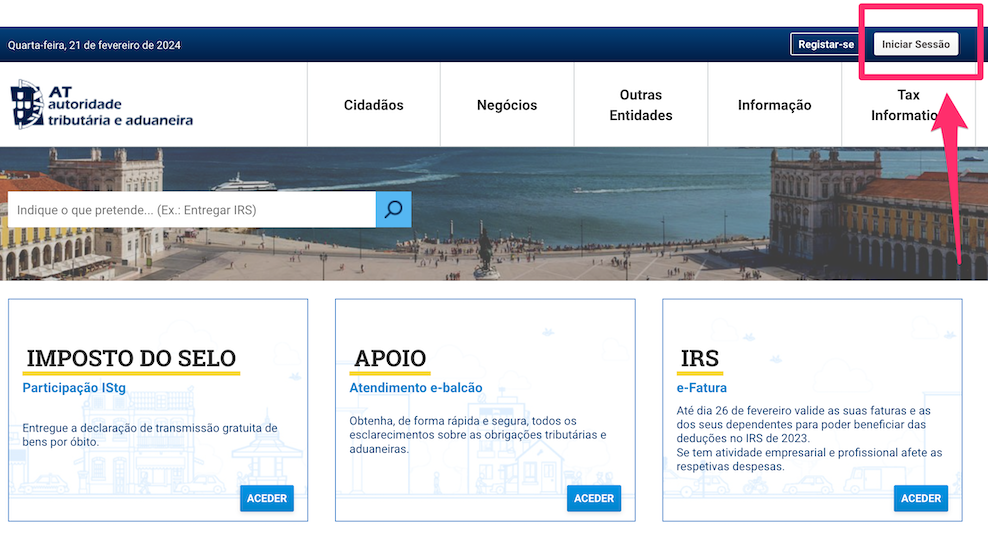
1. Visit https://www.portaldasfinancas.gov.pt/
2. Locate and click on the “Iniciar Sessão” button at the top right corner of the page.
3. Select the “NIF” tab and enter your NIF number along with the password.
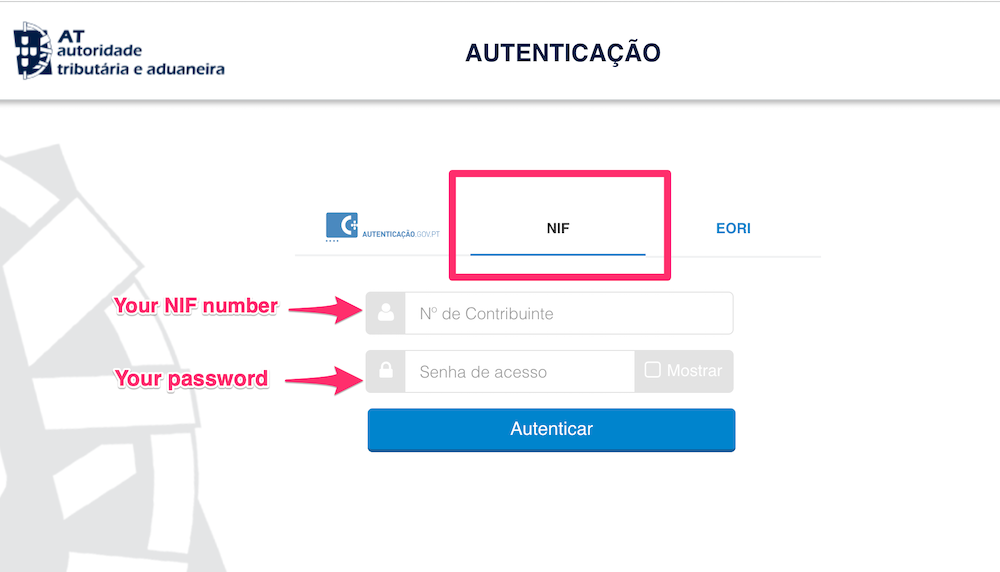
4. Click the “Autenticar” button.
Step 2: Navigate to your notification settings
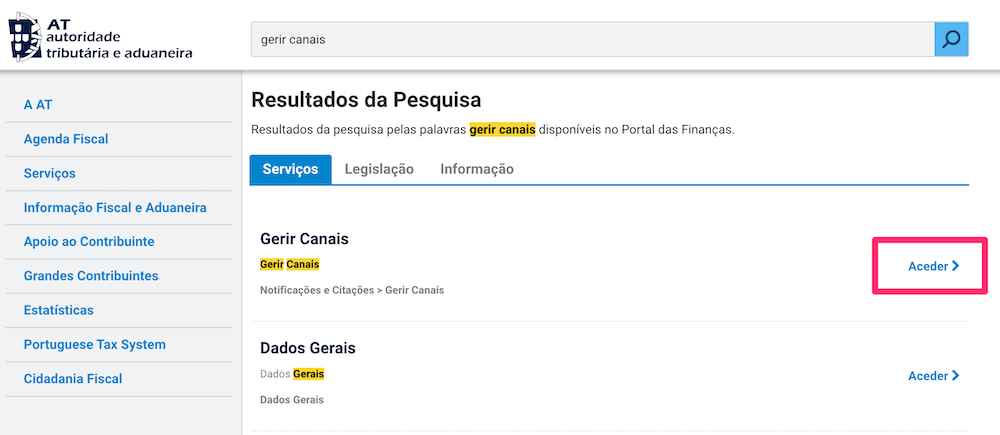
1. Search for the keyword “Gerir Canais” using the search bar at the top of the page.
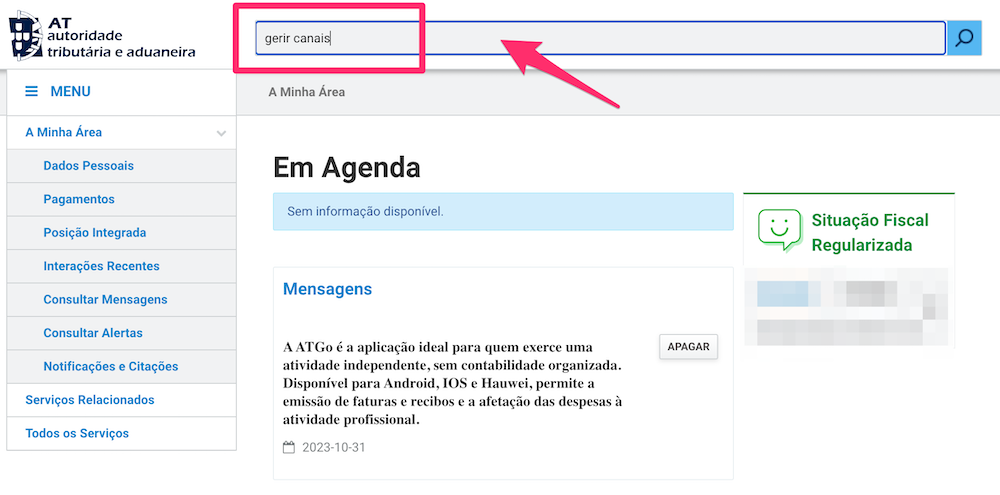
2. Find “Gerir Canais” and click Aceder.
Step 3: Activate electronic notifications
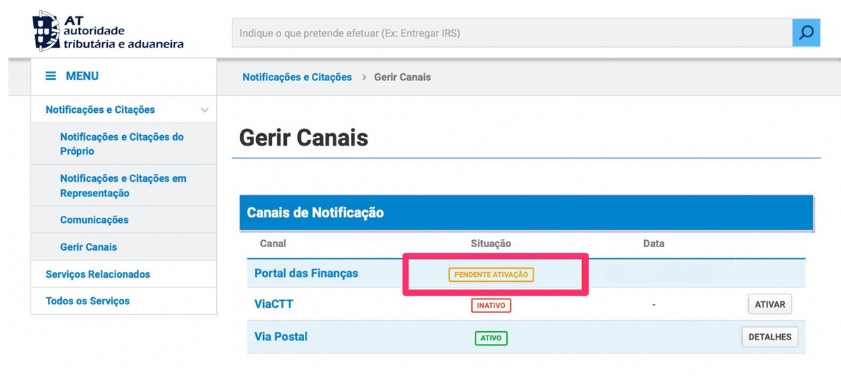
Under the section “Canais de Notificação”, find the “Portal das Finanças” row and click the Ativar button. The status should change from “Inativo” (inactive) to “Pendente Ativação” (pending activation).

Your request will be approved based on the following schedule:
| Date Of Request | Activation Date | Example |
|---|---|---|
| On or before the 10th of the month | 1st of the following month | Requests made on January 7 will be activated on February 1 |
| After the 10th of the month | 1st of the month after the next | Requests made on January 11 will be activated on March 1 |
Here’s a sample of what you’ll see after you click the Ativar button.
Step 4: Confirm activation
Repeat Steps 1 and 2 to log back into the Portal based on the schedule above.
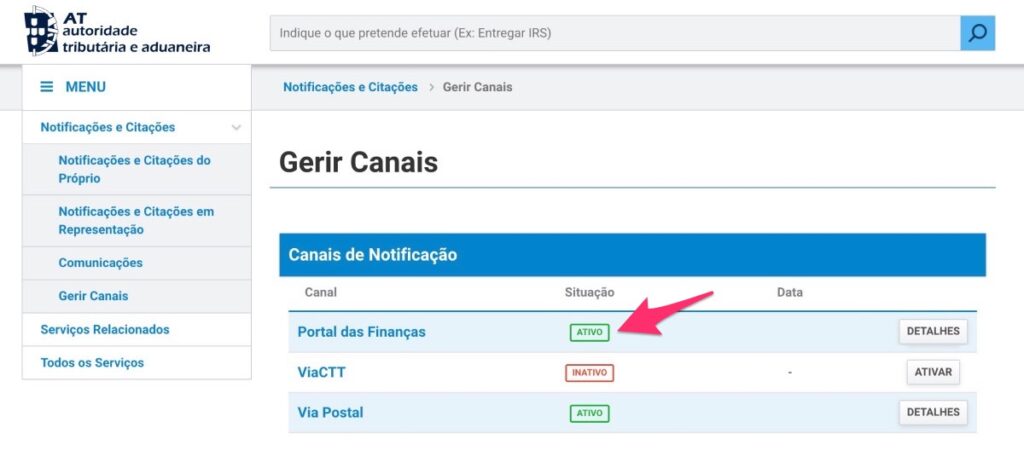
Once the status of your electronic notifications has been updated to “Ativo” (Active), you’ll see the example below.
How to Remove Your Tax Representative
Before deleting your tax representative, make sure you’ve activated the notification channel and it’s in an active state.
Also, to submit the request, you will need to share the following information, so prepare it in advance:
- screenshot showing that you activated the notification channel;
- your current residential address in your NIF;
- your current tax representative information from your NIF (name and NIF number).
Step 1: Open e-balcão
1. Begin by searching for the “e-balcão” using the search bar in your account.
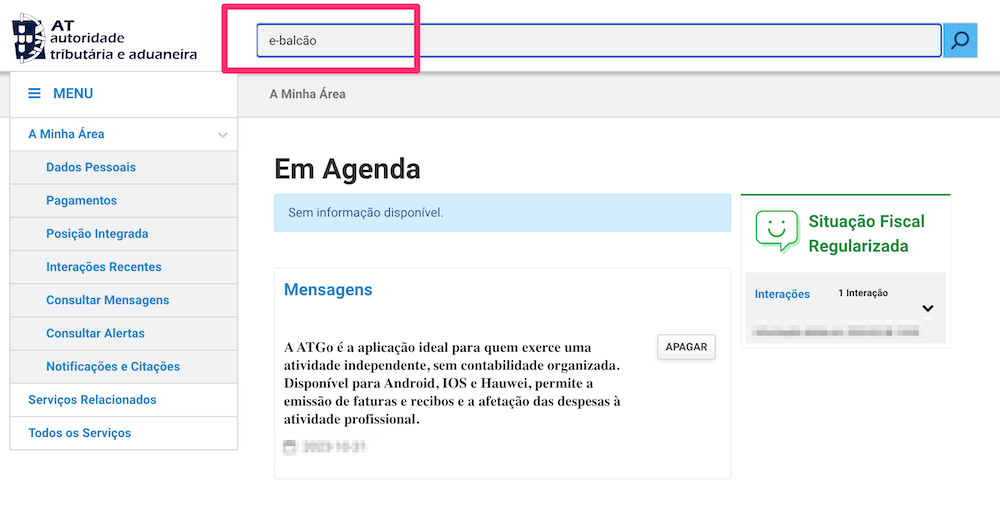
2. Choose “Atendimento e-balcão” and click on “Aceder” to access the e-balcão section.

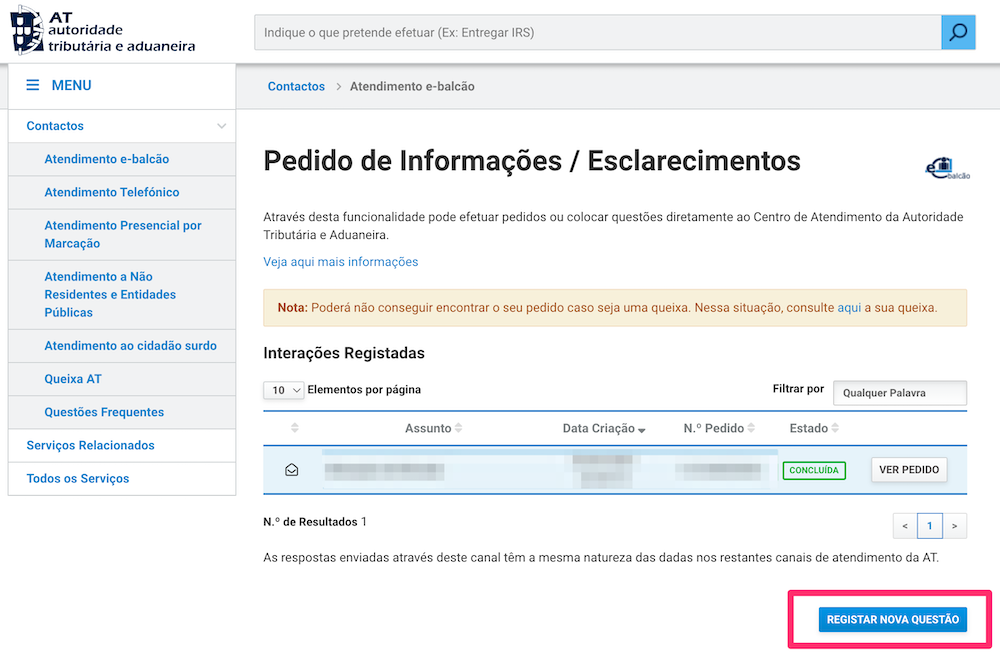
Step 2: Register a new inquiry
In the new window, click on the “Registar Nova Questão” button in the right bottom corner.
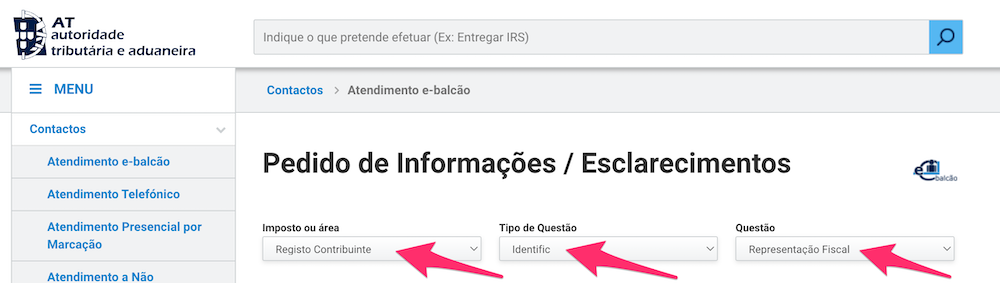
Step 3: Submit Request
1. Next, select the appropriate options from the drop-down menus, exactly as shown in the screenshot below.
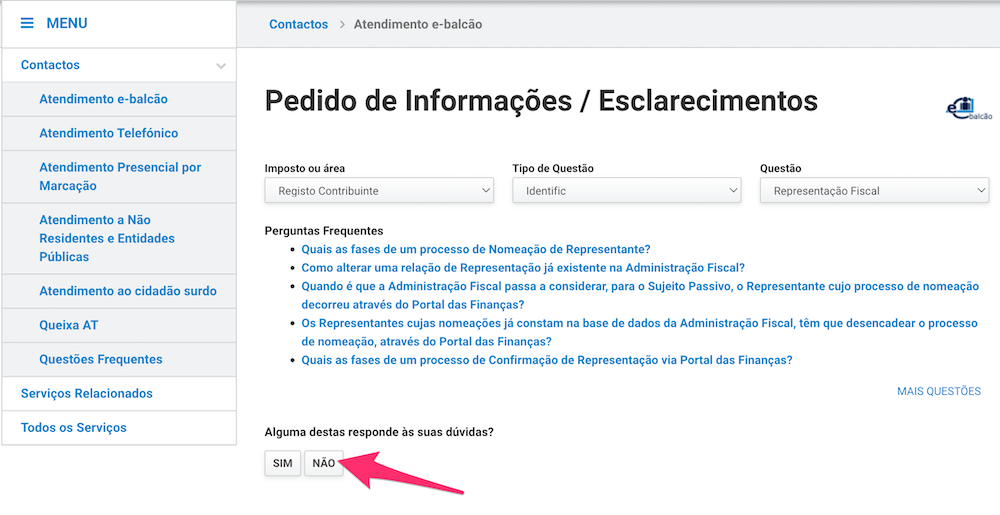
2. Respond “Não” to the question “Alguma destas responde às suas dúvidas?”
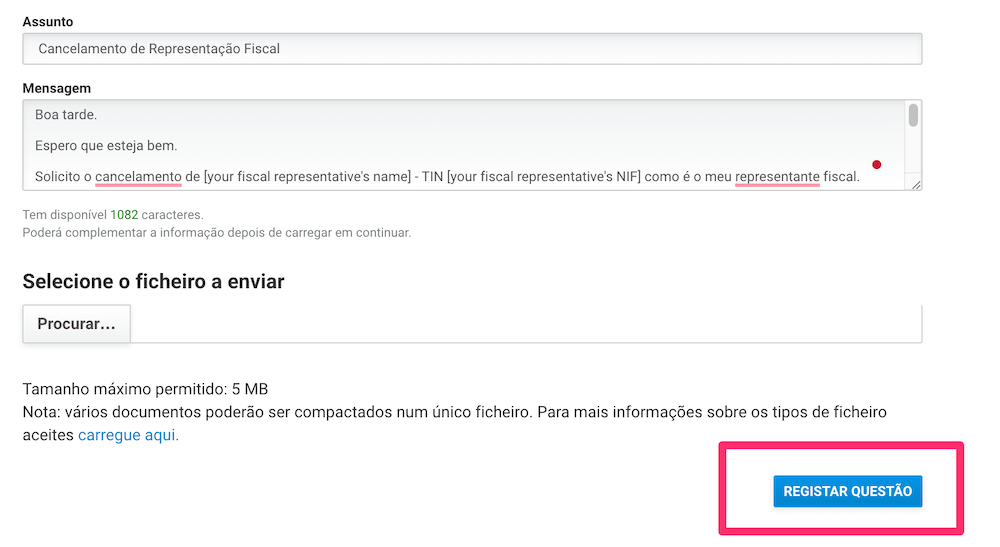
3. Complete the form by copying and pasting the text provided below, ensuring to replace the placeholders with relevant information such as your fiscal representative’s name and NIF, your current country of residence, and your name.
| Field | Text | Translation |
| Assunto | Cancelamento de Representação Fiscal | Cancellation of Fiscal Representation |
| Mensagem | Boa tarde. Espero que esteja bem. Solicito o cancelamento de [your fiscal representative’s name] – TIN [your fiscal representative’s NIF] como é o meu representante fiscal. Vivo actualmente em [your current country of residence]. Ativei as notificações eletrónicas no portal, e não tenho obrigações fiscais em território português. Muito obrigado pela sua assistência. Cumprimentos, [Your name] | Hello, I hope you are doing well. I request the cancellation of [your fiscal representative’s name] – TIN [your fiscal representative’s NIF] as my fiscal representative. I currently reside in [your current country of residence]. I activated the electronic notifications in the portal, and I have no tax obligations in the Portuguese territory. Thank you very much for your assistance. Best regards, [Your name] |

4. Attach the screenshot taken after you have confirmed the electronic notifications. For that, click on the “Procurar” button and upload your screenshot.
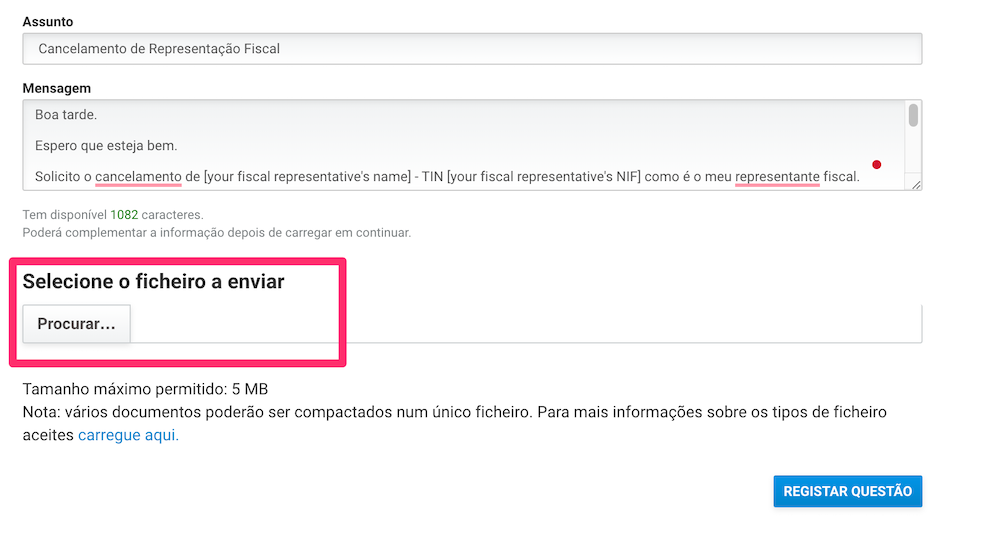
5. Then click on the “Registar Questão” button to submit your request.
6. Wait for a couple of business days to have your NIF updated.
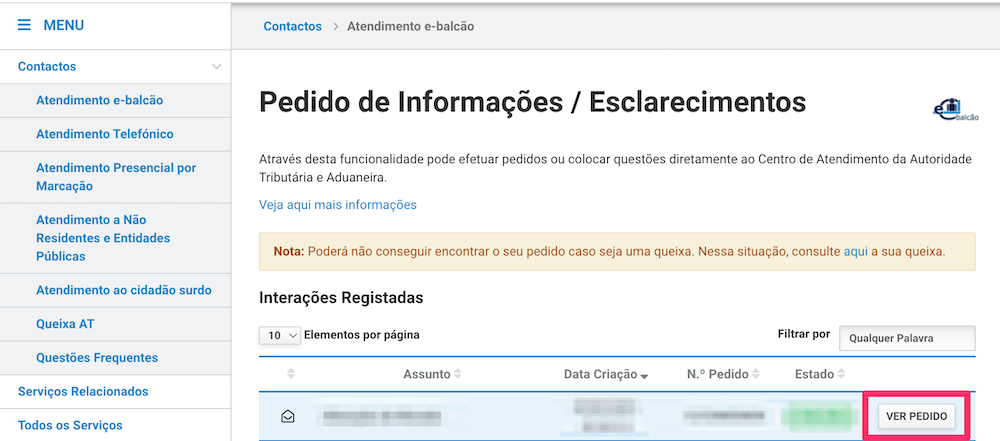
Step 4: Save your updated NIF
1. Log in to Portal das Finanças.
2. Navigate back to e-balcão as mentioned in Step 1.
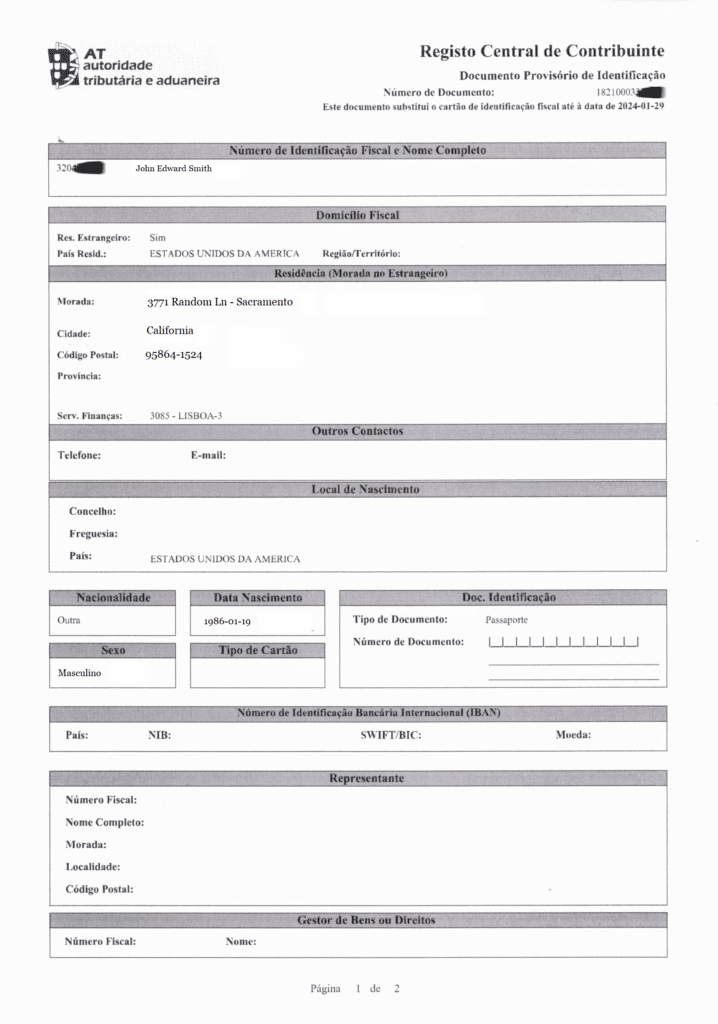
3. Under “Interações Registadas,” locate your message thread and click on “Ver Pedido.” If the cancellation of fiscal representation was successful, your updated NIF document should be attached to their response.
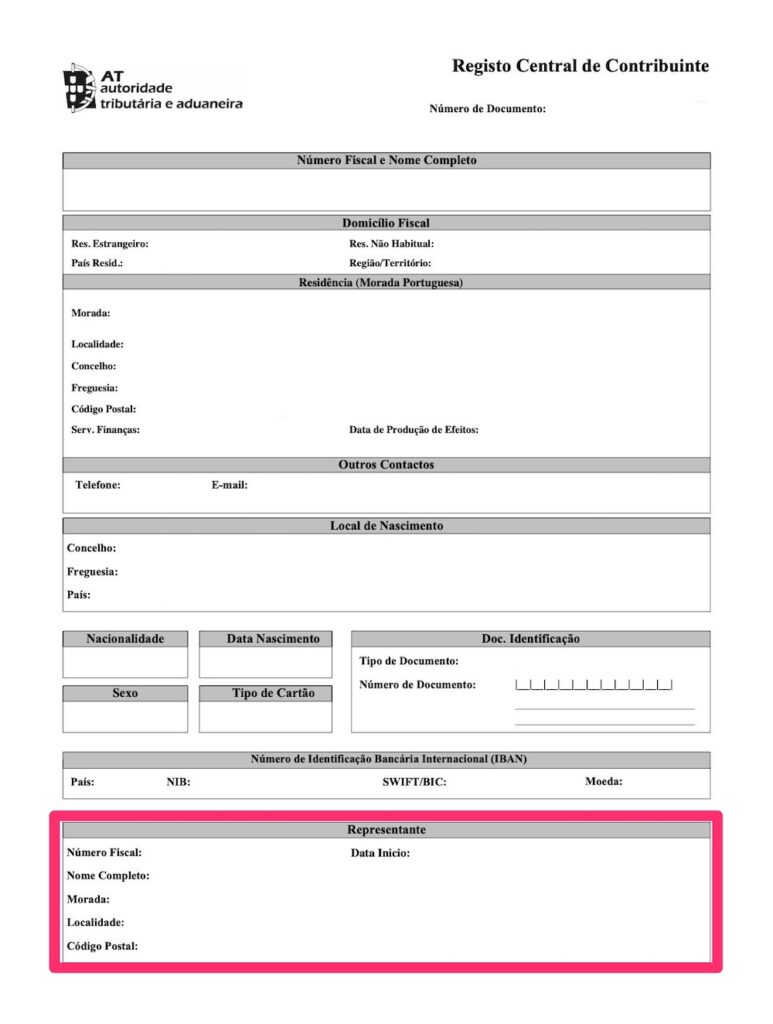
4. Download your updated NIF document and check that the “Representante” section of your new NIF document is empty. Now you can celebrate your accomplishment! 🎉
Have a question? Feel free to ask in the comments section below.